How to Build a Homelab Server from Scratch: Complete Guide
How to Build a Homelab Server from Scratch: Why This Problem Happens
Are you tired of watching your monthly cloud storage, web hosting, and media streaming bills creep higher and higher? Relying too heavily on public cloud services doesn’t just eat into your budget—it also strips away your absolute control, raises valid data privacy concerns, and limits your freedom to safely experiment with enterprise-level tech.
Whether you are an aspiring DevOps engineer, a seasoned software developer, or simply a passionate IT enthusiast, not having a dedicated local environment can seriously bottleneck your technical growth. Truly mastering networking, container orchestration, and server administration requires unrestricted, hands-on practice.
That is exactly where setting up your own local infrastructure becomes a game-changer. If you are ready to take back ownership of your data and create a secure, powerful sandbox for continuous testing, figuring out how to build a homelab server from scratch is your ultimate next step.
In this in-depth homelab setup guide, we will unpack the real technical reasons why leaning strictly on the public cloud holds developers back. From there, we will explore hardware options tailored to fit any budget and walk through advanced virtualization strategies to elevate your self-hosting journey.
Why This Problem Happens: The Technical Limits of Cloud Dependency
Today’s technology landscape pushes cloud-first deployments hard. While platforms like AWS, Azure, and Google Cloud deliver incredible scalability, they create a major headache for individual developers and small teams: wildly unpredictable costs and a frustrating lack of deep, root-level system access.
Technically speaking, this issue comes down to the heavily abstracted nature of public cloud infrastructure. When you spin up a virtual machine in the cloud, you are essentially renting a fractional slice of compute power on shared hardware. Plus, public cloud providers charge premium rates for high input/output operations per second (IOPS), persistent storage, and simply moving your data out of their ecosystem (egress fees).
To make matters worse, managed cloud services completely lock you out of the physical infrastructure layer. You simply cannot tinker with the underlying hypervisor, configure bare-metal network interface controllers (NICs), or set up hardware passthrough for highly specific workloads.
This structural barrier prevents developers from truly grasping how infrastructure functions under the hood. Without a local environment, testing complex DevOps tools or running through simulated disaster recovery scenarios becomes prohibitively expensive. Ultimately, relying entirely on external providers stifles your technical curiosity and leaves your personal data entirely at the mercy of third-party privacy policies.
Quick Fixes: Basic Solutions for Your First Homelab
The good news? You do not have to spend thousands of dollars to get a personal testing environment up and running. If you want to dip your toes into self-hosted services, there are plenty of highly accessible, budget-friendly entry points. Here are a few actionable steps to kick off your beginner homelab build today.
- Repurpose an Old Desktop or Laptop: The absolute easiest way to start is by utilizing hardware you already have lying around. Believe it or not, an old laptop makes a fantastic starter server—it even features a built-in keyboard and an uninterruptible power supply (UPS) via its battery! Just format the drive and install a lightweight Linux distribution like Ubuntu Server.
- Utilize Single Board Computers (SBCs): Devices like the Raspberry Pi 5 are incredibly power-efficient. They are practically perfect for running lightweight containerized applications, hosting a DNS sinkhole like Pi-hole, or running a basic file-sharing server.
- Invest in a Refurbished Mini PC: The “TinyMiniMicro” form factor (think 1-liter office PCs from Dell, HP, or Lenovo) hits the perfect sweet spot between low power consumption and solid processing capabilities. Upgrading their RAM and NVMe storage down the line is also a breeze.
- Deploy a Type-2 Hypervisor: If you aren’t ready to dedicate an entire physical machine to your lab just yet, try installing Oracle VirtualBox or VMware Workstation on your daily driver. This allows you to spin up and test isolated virtual machines right inside your current operating system.
These beginner-friendly setups are phenomenal for getting comfortable with Docker containers, messing around with basic network configurations, and trying out simple automated deployments before spending money on heavier hardware.
Advanced Solutions: Enterprise-Grade Infrastructure
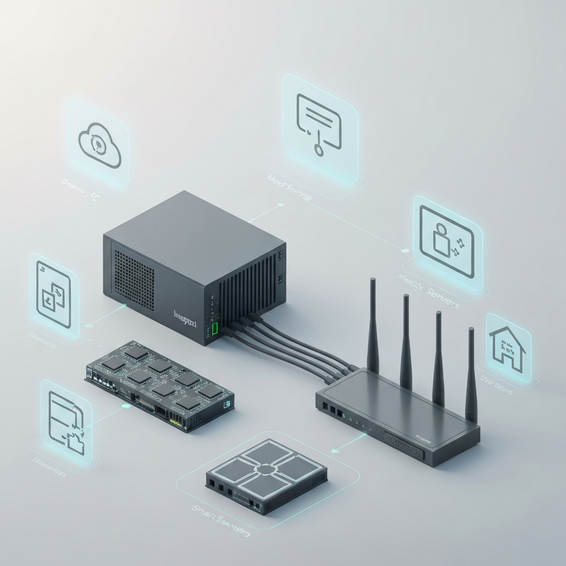
Eventually, you will likely outgrow that single Mini PC or Raspberry Pi. When that happens, it is time to design a much more robust, enterprise-grade environment. From an IT and DevOps standpoint, this means making the leap to dedicated bare-metal server hardware alongside advanced virtualization software.
First, think about stepping up to rackmount servers or custom-built desktop towers equipped with ECC (Error-Correcting Code) memory. Buying used enterprise gear—like the Dell PowerEdge series—gives you access to massive core counts, dual redundant power supplies, and robust remote management tools like iDRAC.
Instead of installing a standard operating system, you will want to deploy a Type-1 bare-metal hypervisor. Platforms like Proxmox Virtual Environment (VE), VMware ESXi, or XCP-ng run directly on the physical hardware, allowing you to carve out precise CPU and RAM limits for dozens of virtual machines and LXC containers. Proxmox VE happens to be a huge community favorite because it is completely open-source and handles ZFS out of the box.
On the networking front, advanced setups call for a dedicated hardware firewall and managed switches. By installing pfSense or OPNsense on a dedicated micro-appliance, you gain the ability to deeply segment your network using Virtual Local Area Networks (VLANs). This means you can safely isolate your trusted personal devices, your public-facing web services, and those notoriously insecure smart home IoT devices into completely separate subnets.
Your storage will demand a more sophisticated approach, too. Implementing a TrueNAS Scale virtual machine and passing your Host Bus Adapter (HBA) directly through via PCIe gives you a rock-solid, network-attached storage solution powered by the highly resilient ZFS file system.
Best Practices for Homelab Optimization
Building the actual server is really only step one; keeping it running efficiently and securely is an ongoing operational requirement. Sticking to proven best practices guarantees that your personal data remains safe and your services stay online without interruption.
Resource Allocation and Optimization
In a virtualized environment, overprovisioning your CPU cores is usually acceptable since your virtual machines will rarely all peak at the exact same time. However, you should never overprovision your RAM. Always make absolutely certain your host operating system has at least 2GB to 4GB of dedicated memory ring-fenced to prevent system crashes during heavy workloads.
Security and Remote Access
Please, whatever you do, never expose your internal services directly to the public internet by recklessly forwarding ports on your router. Instead, route your traffic through a secure reverse proxy like Nginx Proxy Manager or Traefik. Pair that with Cloudflare integration to mask your true IP address and enforce strict SSL/TLS encryption across all your subdomains. For secure backend access, lean on overlay networks or zero-trust VPNs like Tailscale or WireGuard.
Data Redundancy and Backups
Hardware fails—it is an unavoidable mathematical certainty. Protect yourself by employing the industry-standard 3-2-1 backup strategy: maintain three total copies of your data, store them on two entirely different mediums, and keep at least one copy safely off-site. You can use excellent tools like Proxmox Backup Server or Kopia to fully automate encrypted, incremental backups of your vital configurations.
Recommended Tools and Resources
To successfully bring these strategies to life, equipping yourself with the right mix of hardware and software is critical. Here are some highly recommended resources to help you pull off a great build:
- Hardware – Mini PCs: Picking up a refurbished Lenovo ThinkCentre Tiny or exploring Beelink Mini PCs gives you a highly power-efficient machine that is tailor-made for running hypervisors.
- Hardware – Networking: Managed switches from brands like Ubiquiti or TP-Link Omada are absolute must-haves for deploying proper VLANs and managing network segmentation.
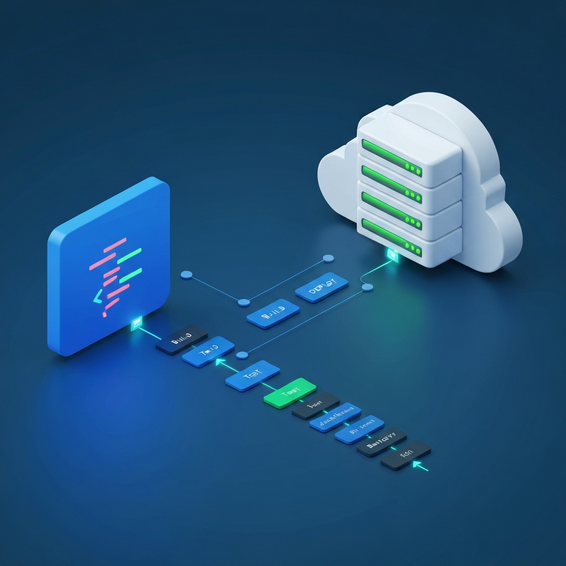
- Software – Orchestration: Install Docker alongside Portainer. This provides a slick visual interface to manage your containers, making the deployment of self-hosted apps incredibly simple.
- Software – Automation: Take the time to learn Ansible or Terraform so you can manage your infrastructure automation as code (IaC). If disaster ever strikes, this lets you rebuild your entire server configuration in a matter of minutes.
Frequently Asked Questions (FAQ)
What is the best OS for a home server?
The “best” operating system ultimately depends on your specific goals. If you want robust, flexible virtualization, a bare-metal hypervisor like Proxmox VE is the industry standard. On the flip side, if you solely want to run a few Docker containers, Debian or Ubuntu Server will provide you with a rock-solid, resource-light foundation.
How much RAM do I need for a homelab?
If you are sticking to a basic setup running a handful of Docker containers, 8GB to 16GB of RAM is perfectly fine. However, if your plans involve running a full hypervisor packed with multiple virtual machines, resource-heavy Windows instances, or ZFS storage pools, upgrading to 32GB or 64GB of RAM is highly recommended.
Is running a home server expensive?
The initial hardware cost can actually be surprisingly low if you repurpose old electronics you already own. The real ongoing expense to watch out for is electricity. By purposely choosing components with a low Thermal Design Power (TDP) rating, like modern Mini PCs, you can keep your monthly power footprint drastically lower than what you’d pay in public cloud fees.
What is the difference between a homelab and a NAS?
A Network Attached Storage (NAS) device is primarily dedicated to storing files and sharing them across a network. A homelab, by contrast, is a much broader, versatile compute environment. It is designed to host diverse applications, run virtual machines, and test complex enterprise software. Often, a homelab setup will simply include a NAS as one piece of the larger puzzle.
Conclusion
Breaking free from exclusive cloud dependency to build your own local infrastructure is one of the most rewarding technical projects you can undertake. By getting your hands dirty and truly understanding underlying hardware and network topologies, you instantly level up your capabilities as an IT professional.
Whether you start out by repurposing an old laptop as a quick fix or jump straight into deploying advanced, enterprise-grade bare-metal hypervisors, the scalability of local hosting is virtually endless. Just remember to adhere to strict security best practices, implement bulletproof backups, and take your time expanding your setup as your technical needs evolve.
Now that you know exactly how to build a homelab server from scratch, the only thing left to do is select your preferred hardware and spin up your very first virtual machine. Reclaim your data privacy and start architecting your ultimate self-hosted environment today!