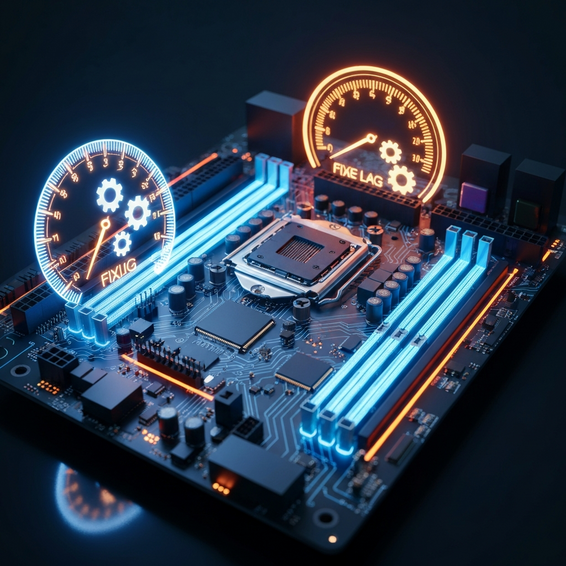
Complete Windows Performance Settings Guide (2024)
Does your computer feel sluggish, even though you have perfectly decent hardware under the hood? Trust me, you aren’t the only one dealing with this. It’s totally common for even top-tier PCs to suffer from frustrating slowdowns when the operating system isn’t properly optimized. Over time, a buildup of background processes, unnecessary bloatware, and demanding visual effects can quietly drain your system’s resources, leaving you stuck staring at endless loading screens.
Figuring out the right configurations to fix this can feel completely overwhelming, whether you’re a casual beginner or a seasoned IT professional. That is exactly why having a comprehensive windows performance settings guide is so essential. It gives you the roadmap you need to reclaim your system’s maximum speed and restore overall stability.
In this article, we are going to walk you through the exact steps required to fully optimize your machine. Covering everything from simple, basic adjustments to advanced developer-level tweaks, you will learn exactly how to squeeze every last ounce of performance out of your operating system. Let’s dive right in and get your PC up to speed.
The Ultimate Windows Performance Settings Guide: Why PCs Slow Down
Before we jump straight into the fixes, it helps to take a step back and understand why this slowdown happens in the first place. By design, Windows has to run smoothly on a massive variety of hardware configurations. Because it needs to cater to everyone, Microsoft sets the default settings to prioritize broad compatibility and flashy visual appeal rather than raw, unadulterated performance.
If we look at the technical side, one of the biggest culprits behind system lag is the sheer volume of background processes. Practically every time you install new software, there is a very high chance it secretly tacks on a hidden background service or an automatic startup task. These sneaky additions quietly chew through your precious RAM and CPU cycles without you ever realizing it.
On top of that, modern operating systems rely incredibly heavily on telemetry data and visual indexing. While features like constant file indexing, transparent window effects, and background diagnostics might sound useful, they often create significant input/output (I/O) bottlenecks on your storage drive. Understanding these underlying technical hurdles is the critical first step before you can properly execute the steps in this windows performance settings guide.
Quick Fixes / Basic Solutions
If your goal is to quickly reduce CPU usage and free up some trapped system memory, it’s best to start with the basics. You certainly do not need to be a skilled developer to pull off these fundamental tweaks. In fact, these simple, straightforward steps frequently yield the most noticeable improvements for your everyday computing tasks.
- Adjust Windows Power Plans: Right out of the box, Windows defaults to a “Balanced” power plan to help conserve energy. If you are running a desktop PC or your laptop is currently plugged into the wall, go ahead and switch this setting to “High Performance.” Doing this stops the CPU from aggressively throttling down its clock speed.
- Disable Startup Programs: Simply press Ctrl + Shift + Esc to fire up your Task Manager. From there, navigate over to the Startup tab and disable any applications that aren’t strictly essential. You’d be surprised how much this single, quick action can drastically improve your computer’s boot times.
- Turn Off Visual Effects: Sure, those sleek Windows animations look fantastic, but they also gobble up valuable GPU and CPU power. Hit the Windows key, type “Advanced system settings,” click the “Settings” button under the Performance section, and choose “Adjust for best performance.”
- Enable Storage Sense: Head over to Settings > System > Storage and toggle on Storage Sense. This incredibly handy built-in feature works in the background to automatically clean up temporary files and empty your recycle bin, ensuring your drive stays fast and uncluttered.
- Uninstall Bloatware: Software pre-installed by the manufacturer is notorious for running completely unnecessary background services. Take a moment to browse through your Apps & Features menu and remove any programs you know you never use; it’s an easy way to instantly speed up your PC.
Advanced Solutions for Power Users
Now, if you are an IT professional, software developer, or a dedicated HomeLab enthusiast, those basic fixes probably won’t cut it. Anyone running heavy workloads—think virtual machines, Docker containers, or robust local servers—is going to require much deeper optimizations. Let’s look at things from a developer’s perspective to see how we can maximize your system’s efficiency.
Your first move should be to consider disabling any unnecessary Windows features and lingering background services. Press Win + R, type in services.msc, and keep an eye out for specific services like SysMain (which you might remember as Superfetch) or Windows Search. If your rig is running fast NVMe SSDs, SysMain has a bad habit of causing unnecessary disk write operations. Disabling it not only reduces overall drive wear, but it also frees up valuable disk I/O bandwidth.
Moving on, another highly critical advanced fix involves utilizing system registry tweaks and Group Policy edits to effectively disable telemetry. Microsoft’s constant diagnostic data collection can surprisingly consume a fair chunk of both your network bandwidth and CPU cycles. By pulling up the Group Policy Editor (gpedit.msc), you can easily navigate down to Computer Configuration > Administrative Templates > Windows Components > Data Collection and Preview Builds, allowing you to turn off this telemetry completely.
For developers who actively use the Windows Subsystem for Linux (WSL), proper memory management is absolutely vital. WSL2 is known to occasionally hog all available RAM on a system. Thankfully, you can reign it in by creating a simple .wslconfig file in your user directory to cap the memory allocation. This quick limit will significantly reduce CPU and memory usage on your primary host OS.
Finally, IT admins and power users alike should really leverage the power of debloat scripts. There are fantastic open-source PowerShell scripts readily available on GitHub that can forcefully strip out Cortana, OneDrive, and those pesky built-in Xbox apps in mere seconds. Just a quick word of warning: always thoroughly read through any scripts before executing them, just to ensure they don’t accidentally remove dependencies that are necessary for your specific development environment.
Best Practices for Long-Term Maintenance
Optimizing your PC isn’t just a “set it and forget it” kind of task; it genuinely requires ongoing care. If you want to guarantee that your system remains snappy and responsive as the years roll by, adopting a few solid best practices is mandatory. Sticking to regular maintenance is the absolute key to fighting off that dreaded, gradual slowdown commonly referred to in the tech world as “Windows rot.”
First and foremost, always keep your drivers and firmware fully updated. While regularly updating the OS itself is obviously important, ensuring your motherboard chipset, dedicated GPU, and network drivers are current is just as crucial for overall hardware efficiency. Hardware vendors are frequently pushing out driver patches specifically designed to resolve newly discovered memory leaks and drastically reduce system overhead.
Secondly, make sure you practice good storage hygiene. An SSD that is stuffed to the brim will inevitably suffer from severe, noticeable performance degradation. As a general rule of thumb, try to always keep at least 15% to 20% of your solid-state drive empty. This gives the drive’s controller enough breathing room to perform necessary background tasks like wear-leveling and garbage collection efficiently.
Third, be extremely cautious when it comes to third-party “PC Boosters.” While they market themselves as speed-enhancing miracles, many commercial registry cleaners and optimization tools practically act as malware or bloatware themselves. You are almost always better off sticking to Windows’ native tools or opting for highly trusted, thoroughly vetted open-source software.
Lastly, strongly consider using virtualization for any software testing. If you are experimenting with new software or running potentially risky applications, simply spin up a virtual machine instead of installing those programs directly onto your host OS. Taking this extra step keeps your primary Windows environment pristine and free from cluttered, orphaned registry keys. Be sure to check out our HomeLab tutorials and Windows guides if you’re looking for more advanced setup instructions.
Recommended Tools and Resources
To make actually executing these optimizations a whole lot easier, there are several incredibly powerful tools that you can comfortably rely on. These utilities are designed to automate complex, tedious tweaks while providing you with deep, actionable insights into your computer’s overall health. Adding a few of these to your personal IT toolkit is highly recommended.
- O&O ShutUp10++: This is a truly fantastic, totally free anti-spyware tool that gives you back control over exactly how Windows 10 and 11 handle your private data. It features a wonderfully simple interface that allows you to disable intrusive telemetry and stop background data collection with just a single click. Download O&O ShutUp10++ here.
- Sysinternals Suite: Officially provided directly by Microsoft, this robust suite of utilities is an absolute must-have for any serious IT professional. Standout tools like Process Explorer and Autoruns offer infinitely more granular detail than your standard Task Manager, making it incredibly easy to hunt down and kill hidden resource hogs.
- BleachBit: Serving as an excellent, lightweight, open-source alternative to those annoying commercial junk cleaners, BleachBit is a lifesaver. It helps you securely wipe unnecessary files, clear out bloated caches, and optimize your disk space—all without relentlessly bombarding you with pop-up ads.
Frequently Asked Questions (FAQ)
Does high performance mode actually work?
Yes, it really does. The High Performance power plan essentially forces your CPU to operate at much higher base frequencies consistently. By doing this, it significantly reduces the latency involved in “waking up” sleeping cores for sudden, demanding workloads. The end result is a noticeably snappier user experience, though it is worth noting that your machine will consume a bit more electricity in the process.
Will disabling services break my PC?
Honestly, it completely depends on the specific service. Disabling vital, core Windows services can definitely cause major system instability or completely break essential features like Windows Update. Because of this, you should always do a quick web search on a service—or stick strictly to community-verified safe lists—before you go ahead and change its startup type to “Disabled.”
How much RAM do I really need to optimize Windows 11?
While Microsoft states that Windows 11 technically only requires a baseline of 4GB of RAM, real-world usage paints a very different picture. Today, 16GB is generally considered the sweet spot for a smooth, entirely bottleneck-free experience. However, if you happen to be a developer who frequently runs heavy IDEs, spins up virtual machines, and hosts local databases, you should strongly consider upgrading to 32GB.
Are registry cleaners safe to use?
Generally speaking, no, they are not. Modern iterations of Windows are actually incredibly efficient at managing the registry all on their own. Automated registry cleaners have a nasty habit of accidentally deleting crucial system keys, which almost always leads to unexpected software crashes. As a rule of thumb, it is vastly safer to just leave the registry alone unless you are executing very specific, well-documented system registry tweaks.
Conclusion
At the end of the day, taking back control of your computer’s hardware resources really doesn’t have to be a daunting or overly complex task. By carefully following the steps outlined in this windows performance settings guide, you can effectively eliminate frustrating bottlenecks, drastically reduce system lag, and even extend the overall lifespan of your machine.
Whether you simply implemented our quick power plan adjustments or you went all-in and executed those advanced registry tweaks, these optimizations are guaranteed to provide a noticeably faster operating system. Just remember to keep up with your regular maintenance, ensure your storage drives stay healthy, and utilize the right developer tools to actively monitor your system’s performance.
Now that your PC is finally fully optimized, it is time to sit back and enjoy a smooth, distraction-free, and high-speed computing experience. Keep exploring new tweaks, always stay updated, and above all else—never settle for a slow, bloated machine again!