N8N Automation Tutorial for Beginners: Build Your First Workflow
Let’s face it: handling repetitive tasks by hand is a massive bottleneck for modern IT, DevOps, and cloud teams. Whether you’re manually shuffling data between SaaS applications, updating customer records, or kicking off server deployments, doing these chores manually is a surefire way to kill your productivity.
If you constantly find yourself copying and pasting data or patching up fragile custom scripts just to keep basic integrations running, it’s time for a more reliable approach. In this comprehensive n8n automation tutorial for beginners, we’ll walk you through building your first workflow using one of the most powerful and flexible automation platforms on the market right now.
By the end of this guide, you’ll know exactly how to bridge the gap between disconnected services and tackle complex data mapping. Better yet, you’ll have your very own open-source automation engine up and running, working tirelessly behind the scenes 24/7.
Why You Need This n8n Automation Tutorial for Beginners
At the heart of most manual work and data silos is system fragmentation. Today’s IT and development teams juggle dozens of different platforms—ranging from CRMs and databases to issue trackers and monitoring tools—that simply weren’t built to talk to one another natively.
Take a typical setup where a team uses Jira to track issues, GitHub for version control, and Slack to communicate. Getting these systems to share information seamlessly can feel like pulling teeth. When APIs are disjointed, developers typically face two unappealing options: spend hours writing and maintaining custom Python or Bash scripts, or fork over exorbitant monthly fees for enterprise-grade cloud automation software.
The problem with custom scripts is that they are notoriously fragile. The moment an API endpoint changes, things break, demanding constant upkeep that eats into valuable engineering hours. On the flip side, commercial plug-and-play tools frequently lack the granular technical access needed to interface with complex, internal legacy systems.
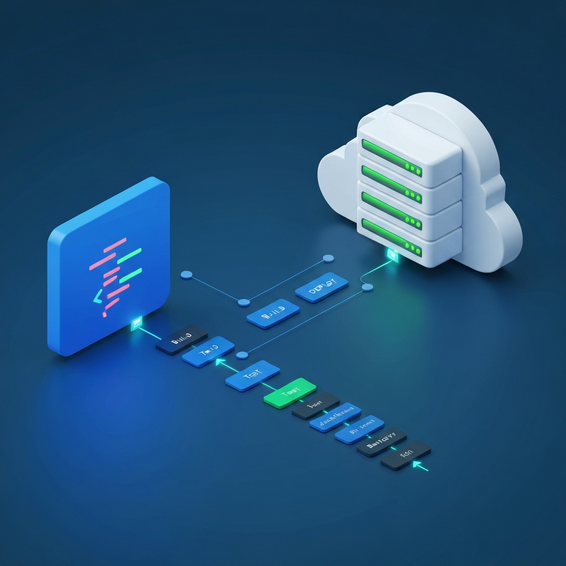
That’s where visual workflow automation comes to the rescue. Widely recognized as an incredibly powerful Zapier alternative, n8n offers a node-based interface that lets you drag and drop visual elements to link up disparate platforms. It dramatically cuts down the hours spent on manual API integration, offering a sweet spot that satisfies both non-technical users and seasoned software engineers alike.
Quick Fixes: Setting Up Your First Workflow
Are you ready to start automating tasks? Let’s walk through the essential steps to get your very first sequence off the ground. These foundational n8n workflows will serve as the critical building blocks for much more sophisticated automations down the road.
- Deploy your n8n Environment: You generally have two routes here. You can opt for the hassle-free managed n8n Cloud, or you can run a self-hosted instance using Docker. If you’re a beginner just wanting to test the waters locally, running a quick
docker run -it --rm --name n8n -p 5678:5678 n8nio/n8ncommand in your terminal will have you up and running in seconds. - Create a New Workflow: With your container actively running, open up your web browser and head over to
http://localhost:5678. From the main dashboard, simply click “Add Workflow.” Give it a clear, recognizable name—something like “GitHub to Slack Lead Notification” works perfectly. - Add a Trigger Node: Every good automation sequence needs a starting point. You can drop in a Webhook node to listen for incoming HTTP POST requests, or you might prefer a Schedule node (which acts much like a Cron job) to kick off tasks at predefined intervals.
- Add an Action Node: Next, click the plus icon on your canvas and search for the app you want to target. Whether you choose Slack, Discord, Google Sheets, or a bespoke database system, all you need to do is connect the output from your trigger node directly into the input of this new action node.
- Map Your Data: Double-click on your action node to pull up its properties. From there, you’ll use the expression editor to dynamically map out your incoming data fields. As an example, you could easily drag an incoming
usernamepayload from your webhook and drop it straight into a Slack message template. - Test and Activate: Hit the “Execute Workflow” button situated at the bottom of the screen to test how the data flows using sample inputs. If everything processes smoothly and your test message arrives as expected, just toggle the workflow switch in the top right corner to “Active” and let it run.
Advanced Solutions for Developers and IT Pros
After you’ve mastered the basic drag-and-drop mechanics, you can start diving into n8n’s developer-centric features to tackle highly intricate logic. Since n8n is built fundamentally on Node.js, it brings advanced programming capabilities to the table that stretch far beyond your standard point-and-click automation solutions.
Among its most robust and frequently utilized tools is the HTTP Request node. If your team relies on a niche SaaS app or a proprietary internal tool that lacks a pre-built integration node, this feature lets you interact directly with virtually any REST or GraphQL API. You retain total control to define custom headers, navigate complex OAuth2 authentication workflows, parse XML, and handle tricky API pagination with absolute ease.
When you need to perform custom data manipulation, the Code node steps up by letting you inject raw JavaScript straight into your workflow. This allows you to transform messy JSON arrays, dynamically calculate and format timestamps, or filter through thousands of database records before handing the data off to the next step. You can even import external npm packages, provided you configure your environment variables correctly ahead of time.
Additionally, if you happen to run a self-hosted n8n instance inside a secure HomeLab or behind a corporate firewall, the Execute Command node is an absolute game-changer. It empowers your workflow to fire off local Bash commands, interact directly with the host operating system, restart background services, and execute comprehensive DevOps infrastructure management tasks without leaving the canvas.
Best Practices for Stable n8n Workflows
To guarantee your automations stay stable, secure, and genuinely easy to maintain over time, following established IT best practices is non-negotiable. A hastily designed workflow can easily trap you in infinite execution loops, trigger aggressive API rate limits, or worse—accidentally expose sensitive credentials.
- Use the Native Credential Manager: Never fall into the trap of hardcoding API keys, database passwords, or secret tokens directly within your HTTP Request or Code nodes. Instead, rely on n8n’s built-in credential manager to safely store and dynamically inject sensitive data, ensuring your secrets remain heavily encrypted.
- Implement Robust Error Handling: Let’s be realistic—workflows will occasionally fail, especially when third-party APIs experience unexpected downtime. By using the Error Trigger node, you can set up a dedicated safety net workflow that globally catches failures and immediately fires off an alert to your team’s Slack channel.
- Keep Workflows Modular: Try to avoid building gigantic, tangled “spaghetti” workflows that are a nightmare to debug. Use the Execute Workflow node to intentionally slice massive processes down into smaller, highly reusable sub-workflows. Think of it as calling individual functions in traditional software programming.
- Secure Your Self-Hosted Instance: If you’re hosting n8n yourself on a public IP address, it is crucial to place your dashboard behind a secure reverse proxy like Nginx or Traefik. Always enforce strict HTTPS/SSL encryption and configure basic HTTP authentication to lock out any unauthorized access attempts.
- Monitor Memory Usage: Node.js applications can be quite memory-hungry, particularly when they’re crunching large arrays or heavy binary files. Make sure your host machine is equipped with adequate RAM, and don’t forget to use the “Split In Batches” node when iterating through thousands of records to actively prevent out-of-memory crashes.
Recommended Tools and Resources
If you want to squeeze the absolute most out of your new automation infrastructure, we highly recommend pairing n8n with these supplementary tools and platforms:
- Docker & Portainer: These are practically essential if you want to deploy, seamlessly update, and visually manage your self-hosted n8n containers without a headache.
- DigitalOcean: A wildly reliable yet incredibly affordable cloud infrastructure provider perfect for hosting your production-ready n8n instance. Get started with DigitalOcean here and claim free credits.
- Postman or Insomnia: Both are fantastic desktop clients for inspecting complex payloads and testing API endpoints locally before you commit to configuring them inside your n8n workflow.
- n8n Community Workflows: Don’t reinvent the wheel. Browse the official template library to discover pre-built automation sequences that you can simply copy and paste right onto your canvas.
Frequently Asked Questions (FAQ)
Is n8n completely free to use?
The community edition of n8n is entirely free and source-available under a fair-code license. This means you can self-host it internally for your personal projects, agency, or broader business use without being burdened by recurring licensing fees. Ultimately, it’s a remarkably cost-effective solution regardless of your team’s size.
How does n8n compare as a Zapier alternative?
Unlike Zapier, which notoriously charges you a premium per task execution, spinning up self-hosted n8n grants you unlimited executions. Your only real boundary is the hardware capacity of your server. Plus, n8n boasts incredibly advanced logic branching, native looping capabilities, and direct JavaScript injection, which makes it a far superior choice for technically inclined users.
Do I need to know how to code to use n8n?
Not at all! The platform’s intuitive visual interface allows non-developers to build surprisingly robust integrations using straightforward drag-and-drop nodes. With that said, having a basic grasp of JavaScript and understanding how JSON data structures operate will drastically elevate your ability to engineer highly complex, custom API integrations.
Can I run n8n safely on a Raspberry Pi?
You certainly can. Countless HomeLab enthusiasts successfully run n8n directly on a Raspberry Pi. Just make sure you’re utilizing a 64-bit operating system and have at least 4GB of RAM onboard. This ensures the hardware can comfortably juggle Node.js background processes and executing workflows without taking a hit in performance.
Conclusion
Building your very first automated sequence really doesn’t need to be an overwhelming technical mountain to climb. By leaning on the intuitive visual builder and an impressively vast library of pre-made nodes, you can effortlessly connect your favorite daily apps, synchronize your databases, and banish repetitive manual data entry for good.
We genuinely hope this detailed n8n automation tutorial for beginners has given you both the foundational knowledge and the creative confidence needed to start streamlining your digital life. Whether you are leaning on it as a budget-friendly Zapier alternative or establishing it as the absolute central backbone of your DevOps infrastructure, n8n delivers an unmatched blend of flexibility and sheer power.
The best approach is to start small with basic triggers, rigorously test your workflows in a safe environment, and then gradually weave in more complex programmatic logic. Start automating your routine tasks today, and reclaim countless hours of valuable time for both yourself and your engineering team.